
Hopefully, by now, you've used the Angular CLI to create a new application, generate some components, served your application and maybe even tested it. In this article we'll dig a little deeper into the Angular CLI and the ways you can use it to boost your productivity! If you're not too familiar with Angular & the CLI (or would just like a refresher), you'll want to check out Josh De Gouveia's article "Getting Started With the Angular CLI".
Options & Workspaces
How do I create Angular applications and libraries?
As of Angular version 7, creating an Angular workspace with applications and libraries is a breeze with the CLI. The first command you'll run is ng new with the --createApplication=false option:
ng new <workspace-name> --createApplication=false [options]
This command will create a bare-bones Angular workspace, ready for multiple applications and libraries.
Next, go ahead and generate your first application:
ng generate application <name> [options]
Then, add a library:
ng generate library <name> [options]
If you're working with multiple applications that use shared code, Angular workspaces are the way to go. To learn more about this strategy, check out this article!
How do I undo a CLI command?
In short: you don't. At least not with a CLI command. For instance: once you have created a component, and especially once you've started using it, removing a component can get a little complicated. You'll need to remove not only the component's files but any declaration of that component, as well as any usage of that component within other components or routes. For this reason, it may be useful to include the --dryRun or -d option. A dry run will let you preview what will be generated by the CLI. Once you've checked the output, remove the option and generate your component, route, service, pipe, etc. anxiety free.
Shortcuts
Aliases
As if the CLI wasn't saving you enough time generating your applications, libraries, components, etc.; most commands have aliases, so you don't even have to type the whole command!
- Generating a new module? ng generate module foo becomes ng g m foo.
- A component? Use ng g c bar instead.
- No need to type out ng serve, it's just ng s
You get the picture. To see the full list of commands and aliases, check out the docs at this link.
Docs
Speaking of the Angular docs, did you know you can search and access them from the CLI? If the API Reference page includes it, you can search for it using the command ng doc <search-term>. Let's say you want to learn more about Reactive Forms: enter ng doc ReactiveForms and your browser will open a new tab with a link right at the top of the page for the ReactiveFormsModule. Give it a try!
Configurations & Customizations
ng config
When you generate an application or a workspace, the CLI generates an angular.json file at your project's root. It's easiest to open the file, see what's in there and make any changes as necessary.
However, Angular gives you a way to check and change these values through the command line with ng config. ng config takes a dot notated JSON path, as well as an optional value. So if you want to check your application's component prefix, you enter: ng config projects.<app-name>.prefix and the CLI would output app or whatever you have previously determined your prefix to be. If you enter: ng config projects.<app-name>.prefix asdf, your prefix for newly generated components and directives will now be asdf.
Going deeper
Opening up the angular.json file, reading and modifying the values in there is great but; what if what you want to change isn't there? This is where the real power of ng config comes in. Unfortunately, angular.io doesn't document all the available options for ng config. However, if you look in the json schema for config (node_modules/@angular/cli/lib/config/schema.json), you'll find every option available for configuring the CLI to your liking.
For example: if you look at line 6 in the schema, you'll see all the different properties available:
$schema, version, newProjectRoot, projects, and defaultProject all look familiar, those are in angular.json. But what about cli & schematics?
Do you love Yarn or pnpm? Maybe you never want to see another package-lock.json file. Either way, enter ng config -g cli.packageManager yarn and every project you generate with the Angular CLI will use Yarn instead of the default NPM (leave off the -g if you only want the change in your current project).
Maybe you're a big fan of keeping all your styles and templates in the component.ts file. In that case, use ng config schematics.@schematics/angular:component.inlineStyle true and ng config schematics.@schematics/angular:component.inlineTemplate true adding -g to each if you want to make it a global change.
Updating
How do I update Angular & the CLI?
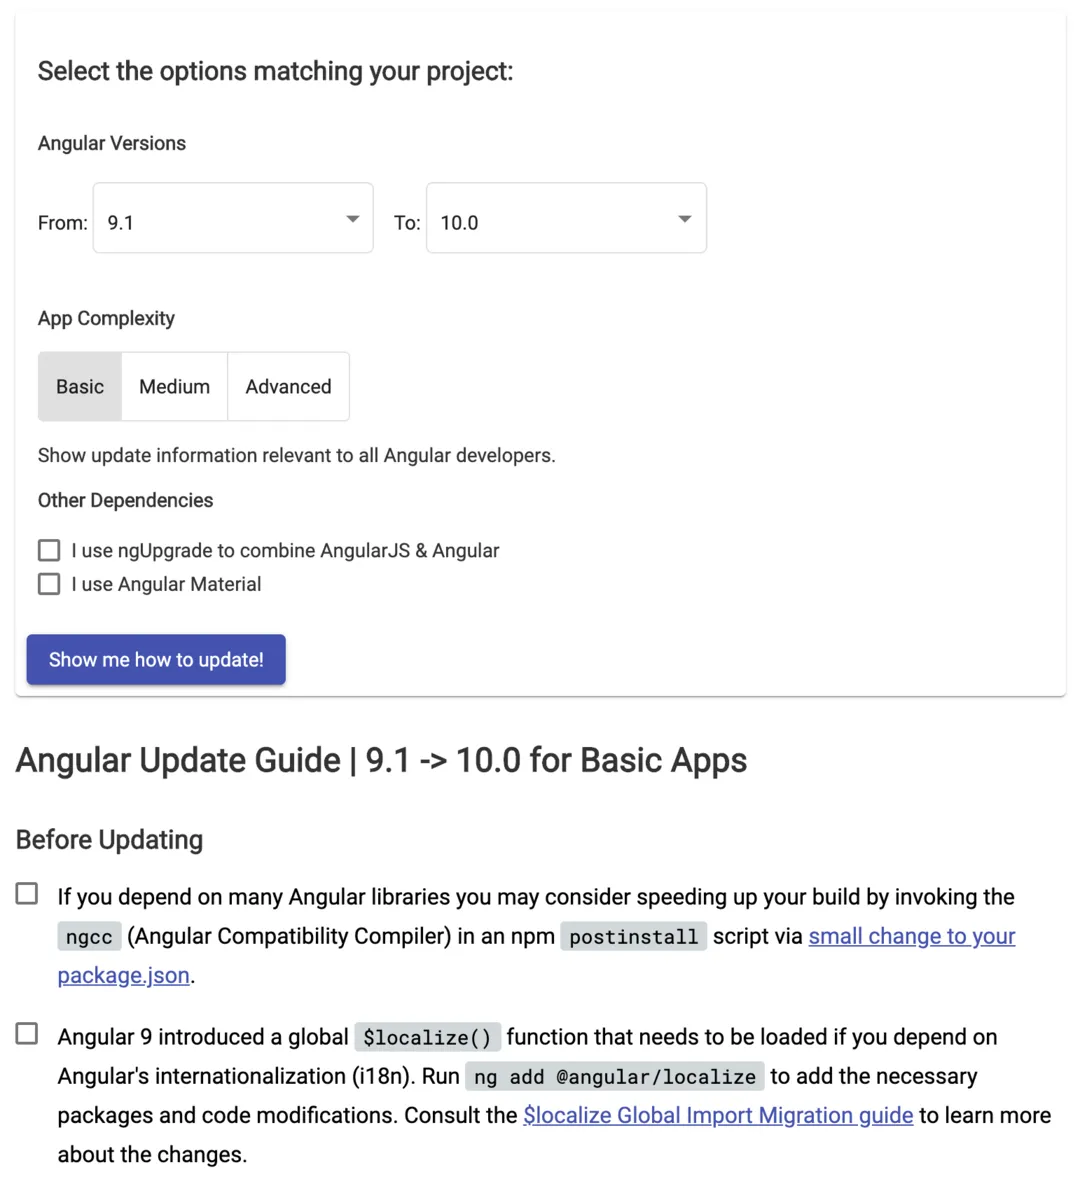
Updating an Angular application or the Angular CLI depends on a few things. Have you started your project yet? If not, make sure you have the latest version of the Angular CLI installed globally by running the command npm i -g @angular/cli@latest. This command will build your new application with the latest stable version of the CLI and Angular. Are you on the next highest version of Angular and the CLI? Run ng update @angular/core @angular/cli, this is going to update you to the latest version of each. Important Note: updating across multiple major versions of Angular (e.g.: v8.1 > v10.0) is never recommended. Whether you're on version 8 or 6, I recommend heading over to update.angular.io for a step by step guide to updating your Angular application.
Deploy
Did you know you can automatically deploy your Angular application to a remote server using the CLI?
As of version 8.3.0, the Angular CLI introduced a new ng deploy command. This command utilizes the CLI builder functionality tied in with a schematic for your server platform of choice. If you'd like more information on CLI builders, check out this article where I demonstrate how to use a CLI builder to run Cypress end to end testing through the Angular CLI.
If you're hosting your application on Firebase, you'll run the command ng add @angular/fire. By adding this schematic, their deploy builder will be used when you run the ng deploy command. Similarly, if you host on Azure, ng add @azure/ng-deploy will allow you to deploy there using ng deploy. There are many other platforms with available schematics for deployment, including but not limited to Netlify, Github pages and AWS.
In Summary
To recap, we've covered:
- Creating an Angular workspace with multiple applications and libraries
- "Undoing" a CLI command and using the CLI to avoid needing to in the first place
- Using command aliases and the ng doc search
- Configuring and customizing your development experience, allowing you to be more efficient
- Updating the CLI and your Angular applications
- Deploying automatically to a remote server
If you'd like to learn more about extending the CLI through your own custom schematics, check out this article by Kevin Schuchard where he demonstrates building and testing schematics in a sandbox environment.
Thank you for reading, and feel free to reach out if you have any questions!